


Do Painters Provide the Paint, or Do I Need to Buy It Myself?
When planning a painting project for your home or business, one of the most common questions homeowners ask is: “Do painters provide the paint, or do I need to buy it myself?” At Arana Craftsman Painters, we understand the importance of clarity before the first brushstroke. Knowing who supplies the [...]

How Many Coats of Paint Are Usually Applied?
At Arana Craftsman Painters, we understand that a flawless paint job is more than just applying color to a surface. It is a carefully planned process, perfected through years of craftsmanship, that transforms interiors and exteriors into works of art. One of the most frequently asked questions from homeowners is: [...]
What Should I Do to Prepare My Home Before the Painters Come?
A Complete Guide by Arana Craftsman Painters When it comes to residential painting, preparation is the cornerstone of a flawless result. At Arana Craftsman Painters, we believe that the collaboration between homeowners and our professional team begins before the first brushstroke is made. Preparing your home properly ensures efficiency, protects [...]

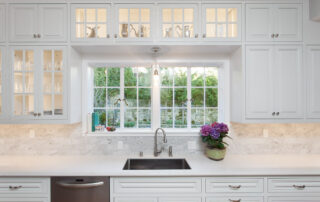
Guide to Choosing the Right Paint Brand for Your Kitchen
When painting your kitchen, selecting the right color and the brand is an important decision. The kitchen is the heart of the home and needs to be durable and resistant for the unique challenges kitchen surfaces face such as moisture, grease, and temperature variations. With an array of brands available, [...]

Should I Paint My Ceiling White?
Choosing the right paint color for your ceiling can be a crucial decision in interior design. Many homeowners default to white when it comes to ceiling paint, and for good reasons. White ceilings have long been a popular choice, and they offer several advantages. However, deciding whether to paint your [...]

Comprehensive Guide to Hiring a Professional House Painter
Paint is THE most important thing you can do to protect your home and embarking on a house painting project comes with a lot of decisions and even more questions. The key to a successful outcome lies in selecting the right painting contractor. This comprehensive guide aims to equip homeowners [...]

How to Combine Textures and Colors for a Space You’ll Love!
Creating a unique home aesthetic that speaks to you and looks beautiful to the world isn't just about throwing together a bunch of colors and textures and hoping for the best. Interior Design is an art form (and if you have the resources, we recommend working with an interior designer). [...]


