Moonset Mary Albert

Artist, Artisan & Crafter: A Journey into the Work of Glass Maker Mary Albert

The glass art greets one on the approach to her front door, sculptures both vertically and horizontally oriented, in the garden and on the porch. I am at the home of Mary Albert, glass artist, and longtime Arana client. Fans of our newsletter may recognize the sumptuous interior colors she chose for her basement ADU which we’ve featured before in this newsletter, or her kitchen with the art-tile backsplash, included among the many favorites in our cookbook.

IMG_0822


We start our tour in the driveway; her mosaic tiles in non-matching designs are set along the two sides. The tiles used to be just laid in the dirt, until somebody stole one, and she took the rest inside to reassess. “Why did they take THAT one? Am I angry or am I flattered?” she mused at the time. (Today, the missing tile has been replaced by a new one, and all 26 are now permanently installed.)

The garage door opens to reveal an inviting mad scientist’s/artist’s lair, outfitted all around with shelves holding pounds and pounds of colored glass and gear; workstation front and center. 

IMG_0809

Inside the house, our first stop is the dining room table where all of her current for-sale pieces are laid out in piles and wrapped in foam, awaiting pricing for her next show. More of her glass-art dishes, plates, plaques, and organic shapes are displayed throughout the house, sometimes next to pieces made by other glass artists she respects and admires. We visit her kitchen, featured in Arana’s cookbook, and I get to see close-up the mosaic backsplash featuring a fleur de lys; a piece she commissioned mosaicist Gina Domingue to make for her and that they built to be removable, should she ever decide to move.

IMG_0808

We retire to the back balcony, surrounded by chirping birds and more of her outdoor landscape adornments, a set of glass and cement stepping stones are visible in a path that meanders down through the garden below.

Our interview begins… Artist, artisan, crafter? All of the above. 

Mary explains, “People love the Craft vs. Art discussion. I don’t hold that distinction, necessarily I think possibly the difference is that craft is usable and art is a visual feast; and so many arts are crafts and so many crafts are art.

“When I started, I was making pieces I was really enjoying making, which were very large and kind of expensive to make, and they weren’t selling the way I wanted them to.

“I didn’t know what I was going to do to change that. I started looking at ways to use up scrap glass. Every week I would make small pieces with that; wasabi dishes, sushi dishes, dessert plates for petit fours, and they were selling – people loved them!

harlequin - mary albert

“The big stuff, people think, ‘What am I going to do with that? Who can I give it to? I can’t afford it.’ But then, sometimes something speaks to you and you really want that thing. Someone might say to me, ‘I love that! Do you have anything like that, but smaller?’”

Ascend

Her light eyes sparkle as she speaks. “What’s been lovely is that people come back a couple months later for the larger piece: ‘Do you still have it? I can’t stop thinking about it! I really want it.’”

Her voice has distinctive rasp, and a cadence that is almost bubbly but with an underlying intensity, the fierceness with which she approaches everything – from her past experiences as a law school student, a denizen of corporate America, a second career as a voice-over actor, and now her work making fused glass. Her nom-de-kiln is Glass-Vox (glass-vox.com), a nod to her two favorite professions.

Utility and beauty are almost equal parts of her ethos. “I like making things that people can use. Most of what I make is useful – not just art. I believe to my core that art is crucial. And, I like color. I love to set a pretty table! If you have color popping on that table, that’s fun!”

267304071_2956064881325668_1324054258912832257_n

At the time of publication, Albert and other artists like her are gearing up for holiday craft sales. While she is adept at gift-sized art, Albert is not in the business of making multiples past an individual set.

s113538493770488759_p412_i1_w768

“A lot of people go into production and they are brilliant at it,” she notes. “But I don’t typically make the same thing more than once.” Her plates come in sets of two or sometimes four. “I have too many ideas in my head to do sets!” she laughs. “I love a matched pair and have done things that are similar or could go together; I will use the same color palette to make a serving set – bowl, platter, plates – but they will not be exactly identical.” She doesn’t repeat her mosaic pieces, either.

Albert’s “functional art glass” is also not just for sale. She regularly donates pieces to community fundraisers and rents work out for staging homes. 

Her passion for glass art started with a class in the early 2000s, and later, joining The Crucible in 2013 was a turning point, giving her access to a large-scale kiln to make bigger pieces, as well as immersing her in the inspiration and encouragement that comes from being among a community of fellow women-artists. 

She says, “What I discovered, working alongside this group of all-women, some who had been doing this for 20-plus years; they were all so generous and kind, offering advice and suggestions and tips…. In the classroom you are making smaller pieces. Once you join a lab, you are sharing molds and other resources. You learn so much in that situation, even just observing, and that emboldens you to try something new.”

The kiln itself is a collaborator and co-conspirator. Albert describes, “A lot of magic happens in the kiln; forgiveness and joy comes out of the kiln. You put something in and you didn’t know it would flow like this and fill in that gap and when it comes out, all the faults I saw going in have corrected themselves; the kiln makes me look good.”

quadratic mary albert

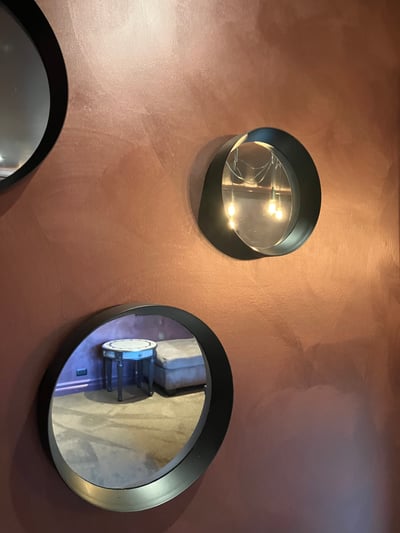
We finish our meeting with a tour of the downstairs ADU. Where the main living area of the house boasts a more subtle palette, the ADU is where Albert let her imagination run a little wilder. With the assistance of a color consultant, and her experience in a painting-textures class, she selected the rich coppery textured wall for the entry and kitchen, and the deep “dark cherry” almost-purple textured walls with glossy chocolate-brown trim and ceiling in the living room – colors that evoke a feeling of “steam-punk” luxe.

IMG_0819

Our very last stop on the tour is back out front, admiring more of Albert’s glass art pieces, which are placed amongst the river rocks around a tree in that little patch of garden next to the sidewalk; all of which, so far, remain in situ.

Nadia_Andreini_240510_063-Edit

European Elegance Meets California Cool

By Donatella Mazzini and Simona Corradini

Infusing Italian Flair into West Coast Interiors

As the name of our company implies, we (Donatella and Simona) are both Italian, and our interior design style takes inspiration from the wonder that is Italy. Although we live in California, we return to our home country every year – to visit family, source from our vendors and of course, for inspiration. 

Venice_Canal_Photographer_Donatella_Mazzini

Drawing from the elegance, history, and artistic heritage of Italy while blending in a more laid-back, contemporary vibe of California we create home designs for our clients that are stylish, classic yet fresh, and beautifully livable. Would you like to bring a bit of Europe into your California home?

Here are a few design tips, along with photos from our most recent trip, this past summer:

Classic Meets Modern: Think of a sleek minimalist living room adorned with a vintage Venetian mirror or a rustic Tuscan dining table paired with modern chairs. This juxtaposition creates a unique and eclectic aesthetic that is both sophisticated and inviting. 

IMG_0592

Natural Materials and Textures: Italian design emphasizes the use of natural materials like stone, marble, wood, and wrought iron and brass. Consider pairing a marble sink reminiscent of an Italian villa with a modern kitchen; or terracotta tiles to bring warmth and texture to a patio, reminiscent of the landscapes of Tuscany. 

Artisanal Craftsmanship: From hand-painted ceramics to custom-made furniture, investing in quality pieces sourced in Italy not only enhances the aesthetic appeal but also creates a sense of connection to European artistry and heritage.

Earth Tones and Neutral Palettes: Italian interiors often feature a palette of earthy tones, inspired by the natural surroundings. Warm beiges, soft browns, and muted greens evoke the tranquility of the countryside. 

Maximizing Natural Light: Taking full advantage of natural light is a concept that Italians and Californians share. Large windows and open floor plans invite light in; sheer curtains or strategically placed mirrors can enhance this effect. 

Indoor-Outdoor Flow: Taking inspiration from Italian courtyards and terraces, add comfortable seating areas, outdoor kitchens, and lush greenery to the backyard.

Al Fresco Dining: Adding a rustic wooden table, string lights, and potted plants evokes the charm of an Italian piazza and encourages leisurely meals under an open sky – embodying the relaxed, communal spirit of both cultures.  

Curated Collections: Europeans, particularly Italians, have a knack for curating collections of art, books, and antiques. Californians can adopt this approach by displaying personal collections that tell a story and add character to their homes. 

Timeless Elegance: Choose pieces that transcend trends – quality over quantity, classic pieces, and a cohesive design scheme can create interiors that are both stylish and enduring. 

NadiaAndreini_211011_332

+++

Photo info:

Marble and coffered ceilings balance the contemporary feel of the lighting and colors in this completely transformed kitchen in San Francisco. Interior Design by Florentine Design. Photographer: Nadia Andreini | DILUNA Photography

Venice Canal: Colors mirrored by the water are a feast for the eyes. Photographer: Donatella Mazzini 

This modern chandelier perfectly fits in the classic foyer of this San Francisco Victorian; Interior Design by Florentine Design. Photographer: Nadia Andreini | DILUNA Photography

Minimalism meets beautiful details in this restaurant interior – with a Murano glass chandelier, rich wood tables and beautiful, original, 1500s vaulted ceilings; in Tolentino, Italy. Photographer Simona Corradini

Donatella Mazzini (left) and Simona Corradini (right), founders of Florentine Design

Cestaro-13

Greeting the Soul of a Home: Designing for Historic Homes and the Modern Families that Live in Them

By Laura Martin Bovard

Arana has been fortunate to partner with many talented interior designers in the Bay Area and our long-term relationship with Laura Martin Bovard and LMB Interiors (lmbinteriors.com) is a standout in this regard. It is our pleasure and joy to contribute our team’s craftsman skills to realizing the visions in Laura’s projects, many of which are transformations of architecturally-significant older homes into gorgeous, playful, and inviting environments for the modern families moving into them. We asked Laura to share with our community her thoughts on creating balance between the two forces, old and new; how she approaches adding beauty and enhancing liveability – while touching on some of the recent projects we’ve worked on together for her clients. 

When I first arrive at a client’s home, I greet the space, the landscape, and the architecture, as if they are their own entities. My next step, if it is an architecturally significant home, is to assess the original craftsmanship. I always intend to maintain the original details, the quality that went into the building of the home. 

And then there’s so much more than what meets the eye to consider: There is soul and lived-memory infused into the space, whether from previous owners or the original craftspeople who built it, or both. The history and the stories of how people moved through and lived in a home are woven into its walls and play a part in the way a home feels and looks; just as the new homeowners will add their story. 

I’m such a firm believer that stories are how humans weave together their existence across lifetimes. And historic homes carry  a soulfulness that new homes just don’t. Historic homes cure over time; there’s a richness to them. A certain level of groundedness. You can imagine who else was staring up at that ceiling 80 years ago. The passage of time in a given space is something that’s fun to contemplate; doing so furthers one’s connection to it. 

We greet the soul of the home to be reverential toward the original quality craftsmanship, because legacy homes, historic homes, are almost always built better and with more integrity than what’s built now. A lot of the woodworking was more detailed; you are not going to see a lot of that level of quality and attention these days. 

However, when we begin an interior design project, we want to consider who’s living there today. And if they really want to infuse a totally different aesthetic onto this home, we will necessarily walk a line between honoring the clients and honoring a home. 

Most clients today don’t want to be surrounded by a lot of ornate, heavy velvets and dark colors. They tend to prefer a lighter, fresher palette. And so we find ways to bring in some of that without tipping the scale too far toward one direction or the other – the direction of the original architecture or the direction of the client. That’s the conversation we are having. It’s a very thoughtful process.

Morse House Entry LMB Interiors 2019_10_29_0548b (1) for web

Project: Hollywood Regency

When people buy an estate home, there is a certain amount of stewardship that comes along with it. In particular, our “Hollywood Regency” project demonstrates this. The homeowners – a couple – see it as the community’s home as much as it is their home. They throw parties often, fundraising for civic entities and causes, including Oakland Parks and Rec, Fairyland, and organizations that impact education for Oakland’s youth, plus political fundraising, supporting Barbara Lee and other East Bay politicians. 

Their home, known as The Morse House, is on the list of historical landmarks in Oakland, and it is just stunning. The house set the tone. These clients had a passion for local art, so it was fun to weave their love of it into the designs. Their aesthetic was their own version of what’s known as “Hollywood Regency,” which harmonized with the home being so grand. Hollywood Regency style reached its height of popularity in California between the 1920s and 1950s, so playing with this historical sensibility in this landmark home built in 1934 felt just right. 

Morse House Living Room LMB Interiors alt view 2019_10_29_0323 (1) for web

We brought in bright colors in the furniture and art, with plenty of jewel tones, while keeping walls neutral. We needed painters who understood how to perform a high-quality job on such a significant home, so of course we teamed with Arana Craftsman Painters. 

Some wood features needed to be sanded down and prepped really well to maintain the provenance of the craftsmanship; you can’t just throw a new coat of paint on top of the original wood! The process requires skilled painters who can achieve clean edges and leave it in a good state for either the next homeowners, or the next paint job 20 years down the road. It has to age well. Having a clean, expert, professional paint job keeps the level of quality congruent with a historical home, ensuring the home is maintained with that sense of stewardship and respect. This kind of attention takes a certain level of investment, but it’s longer lasting, looks better, and celebrates the house. 

Project: Piedmont Craftsman

A lot of people buying historic homes today are not only far younger than the structures themselves, but also they potentially have not been exposed to legacy homes before. And so the question becomes, how do you integrate a home with history with the needs of a younger family? In this case, the family that purchased this Craftsman estate were certainly worldly and appreciated quality, but we wanted the interior to reflect their style which was more playful, more energetic, a little bit more fresh. 

One technique we used was color. We enlivened certain areas: the kitchen, the sitting area, the solarium, and the little library with a lighter palette, while maintaining the original kind of grand Craftsman quality of the manor in select other areas throughout the home.

But then there were the very grand touches that were not part of the original architecture to contend with. One set of the home’s previous owners had been Italian, and the owners after them inherited their design additions, which skewed towards a rather heavy-handed Italianate look. These next owners layered in some Asian touches, per their taste. And so, in working with the home and its history for our clients, ultimately, we needed to peel the layers back to restore the original, timeless, tasteful Craftsman elegance. 

Italiante Fireplace Piedmont

Some of the layers we liked, and those we kept. For example, we all agreed that we enjoyed the spirit of the Italianate fireplace. And we liked the more-recently-added tile details and flooring in the solarium, because it felt appropriate for a sunroom to have that. In the dining room, we also kept the ornate ceilings, just touching up and refreshing them. We left that original, very grand application, while choosing to temper the impact with a natural woven grasscloth wallcovering, thus connecting the room in spirit to adjacent, lighter areas of the house. 

Project: Maybeck Craftsman

For this Maybeck Craftsman that had been purchased by very discerning clients, the work was going to involve a very specific challenge: restoring and/or replacing huge areas of redwood paneling – a key design element in Maybeck homes. We knew we needed an expert team, because we needed every detail to be flawless. So of course, this project called for Arana’s “stainmaster” Ernesto and his team.

Stainmaster Ernesto Arana and his team

Color matching the stain from old redwood to new redwood is a challenge, and in this situation, after decades of life, curing, sunlight, et. al. – let’s just call it “50 shades of brown-and-red.” It is a massive undertaking to have new wood look like it was there all along, and to freshen, clean, and care for the old wood at the same time so that it will continue to serve. It’s an art. Color matching it all took many rounds of mixing to get right, and in the end, the results were exactly what the home needed.

Stewardship Is a Relationship

Historic homes and modern families and the design that brings them together is a relationship benefitting from exquisite listening, understanding, respect, communication, and connection. Like any good marriage, each partner affirms and appreciates the strengths the other brings to the equation. Good design is like a marriage counselor, helping the parties to maintain their unique qualities in some areas and choosing where to blend in others; ultimately creating something greater than the sum of their parts.

Read more of Laura Martin Bovard’s articles about theory and philosophy of interior design on her blog and view her design firm’s portfolio at lmbinteriors.com

________

Photo credits:

Morse house: Mo Saito; Piedmont Craftsman: Paul Dyer; Arana Team: Laura Martin Bovard

ARANA-Manchester-Dr-Berkeley-2-1024x683

Professional Berkeley House Painting Services by Arana Craftsman Painters

When it comes to enhancing the aesthetic appeal and value of your home in Berkeley, there’s no better choice than Arana Craftsman Painters. Our dedication to excellence in house painting sets us apart from the competition. We understand that your home is a reflection of your identity, and our skilled team is here to ensure it radiates beauty and sophistication.

Why Choose Arana Craftsman Painters?

Choosing the right painting service is crucial for achieving the desired look and longevity of your interior and exterior surfaces. Our commitment to quality craftsmanship, attention to detail, and customer satisfaction ensures that you receive the best possible service.

Experienced Professionals

At Arana Craftsman Painters, our experienced professionals bring years of expertise in both residential and commercial painting projects. Our team is not only skilled in traditional painting techniques, but also in modern trends and eco-friendly practices that meet the diverse needs of our clients. We pride ourselves on our communication skills, ensuring that you’re informed and involved throughout the entire process, from initial consultation to project completion.

Comprehensive Painting Services

Our services go beyond simple wall painting. We offer a variety of specialized services tailored to meet your specific needs. This includes:

Interior Painting: Transform your living spaces with our interior painting services that reflect your personal style. From color consultation to the final touches, we ensure a flawless finish that will breathe new life into your home.

Exterior Painting: Protect and beautify the exterior of your property with our comprehensive exterior painting solutions. Our high-quality paints and techniques are designed to withstand the elements while enhancing curb appeal.

Trim and Molding Painting: The details can make all the difference. We specialize in painting trim and molding, providing a polished finish that adds elegance to any room.

Cabinet Refinishing: Refresh your kitchen or bathroom with our cabinet refinishing services. We use advanced techniques to restore your cabinets, providing a new look at a fraction of the cost of replacement.

Custom Finishes: For those looking for something unique, we offer various custom finishes, including venetian plaster, faux finishes, and more. Our artistic team is ready to collaborate and create a look that is uniquely yours.

Our Process

At Arana Craftsman Painters, we believe that a successful project begins with thorough planning and communication. Our process can be broken down into several key stages:

1. Consultation and Estimate
The first step is scheduling a consultation where we discuss your vision and assess the project site. Our team will provide a detailed estimate, outlining the scope of work, materials, and project timeline, ensuring there are no surprises along the way.

2. Preparation
Preparation is critical for a successful paint job. Our team meticulously prepares every surface, filling cracks, sanding rough patches, and ensuring that surfaces are clean and primed. This step guarantees optimal paint adhesion and a smooth finish.

3. Painting
Using only the highest quality paints, we meticulously apply the chosen color or finish. Our attention to detail during the painting process is unmatched, allowing us to create a uniform and vibrant appearance. Whether it’s a single room or an entire home, we approach each project with the same level of dedication and professionalism.

4. Final Inspection and Clean-Up
Once the painting is complete, we conduct a thorough inspection to ensure that everything meets our high standards. Additionally, we take pride in leaving your home just as we found it, ensuring all areas are cleaned up and that you can enjoy your newly painted space immediately.

Quality Materials for Lasting Results

We understand that the longevity of your paint job relies heavily on the quality of materials used. That’s why we utilize only the best paints and coatings that are not only durable but also environmentally friendly. Our selection includes various finishes and colors, enabling our clients to achieve their desired aesthetic without compromising on quality.

Customer Satisfaction

At Arana Craftsman Painters, customer satisfaction is our primary focus. We strive to create a seamless painting experience characterized by respect, professionalism, and attention to detail. Our clients’ testimonials reflect our commitment to excellence and our desire to exceed expectations.

Timely Completion

We recognize the importance of timely project completion. Our team works efficiently without sacrificing quality, ensuring your home is transformed swiftly. We provide clear timelines and work diligently to adhere to them, keeping you informed every step of the way.

Follow-Up Services

Our commitment to our clients doesn’t end once the painting is completed. We offer follow-up services to ensure that any necessary touch-ups are taken care of promptly. Your satisfaction with the final product is essential to us, and we are here to address any concerns you may have.

Areas We Serve

Arana Craftsman Painters proudly serves Berkeley and the surrounding neighborhoods. Whether you are located downtown, in the hills, or along the waterfront, our team is ready to bring your painting dreams to life. We understand the unique architectural styles and aesthetic preferences of the area, allowing us to deliver a service that resonates with your community’s character.

Your Vision, Our Expertise

Engaging with Arana Craftsman Painters means partnering with a team that values your vision as much as you do. Our interior and exterior house painting services are designed to reflect your tastes while enhancing the natural beauty of your home. With every stroke of the brush, we aim to create spaces that you’ll love coming home to.

Get Started Today

Ready to revitalize your home with professional painting services? Look no further than Arana Craftsman Painters. Contact us today to schedule your consultation and take the first step towards transforming your space. Let us help you enhance the beauty and value of your home with our expertise and dedication to quality.

Quin_Tuscaloosa_Dining_0045-Edit_R

From Fine Artist to Interior Designer with a Passion for Art: Our Interview with Mead Quin

One of our greatest joys as a paint contractor is supporting Interior Designers in the artistry that they create for their clients’ homes. The Bay Area is fortunate to have so many talented designers, and especially who are such a delight to work with. In this month’s newsletter, we share our interview with Mead Quin, discussing the details of a project from her portfolio that we were honored to be a part of, “Tuscaloosa Avenue,” as well as delving into her personal vision as a designer, and what it’s like to run a firm with a team of designers contributing to the execution of that vision.

Mead Quin Interior Designer

Arana Craftsman Painters: Every designer has a unique style. How would you describe your creative vision? What makes you, you as a designer?

Mead Quin: I think one thing that makes our firm unique is that I didn’t train to be a designer. It was never a path I set out to be on. I studied art, was painting portraits and pursuing my MFA and then life happened and I decided to pivot. Interior design interested me because it’s a creative industry. Little did I know it would be about 20 percent creative and 80 percent managing a business and people!

ACP: That makes sense! Let’s dive into the creative part first: How does your background as an artist impact your design style?

MQ: When I approach spaces, I am looking at them through an artist’s lens. A room is like a blank canvas and I’m pushing and pulling on it as if I were applying paint to it, a little color here, a little depth here, sensing what the lines and the dimensions are calling for, and from that, I’m developing the look and feel of the room. My love for art also informs how much my team and I emphasize it in our designs. 

Art is an important part of what we curate for our clients and encourage them to value in our projects. They don’t always feel as strongly about it as we do. But when we can, we include it, both by curating pieces the client already owns and assisting them with selecting new works.

ACP:It seems like questions of acquiring art or other high-quality items and materials will always come up against budget. How do you reconcile that for clients? 

MQ: Possibly our most important value at Mead Quin studio is timeless design. Timelessness, beauty, restraint, and serenity all go together for me. Things that are beautiful are often simple, they don’t need a lot of embellishment. When you are seeing the core essence of something, it doesn’t have to be fussy or overdeveloped or ostentatious, there is just a quiet beauty.

From an environmental perspective, I feel like we can do better by our environment if we buy items that are made with care from quality materials that will stand the test of time and can be appreciated over generations. This philosophy costs more up front, but costs less in the long run because you are not having to replace items, and you’re not wasting resources.

ACP: Yes! We feel the same way about the products and processes we use. Longevity, long term costs, and reduced impact on the environment are important factors to keep in mind. Speaking of guiding tenets that help us run our businesses… Let’s get back to the other 80% you mentioned earlier. What is it like to run a team of designers, assistants, and staff?

MQ: I have an amazing team! With any studio, but especially a young one like ours — we just celebrated 10 years — I think at first, in the early years, you’re just figuring out who you are; you’re figuring out how big you want to be; you’re figuring out if you’re going to make it at all.

Of course, there’s turnover; people come and go; especially when hiring new designers — they try us on; they’re in discovery for themselves as young professionals. My goal has been to build a team that would be here for the long haul. I know one can only hold on to people for so long, but one of our designers has been with us for eight years, so that’s something to celebrate! I have a few other people who have been with us for three or four years.

Our current goal is to have two design teams. When a project walks in the door, we assign it to one of the teams which is composed of a senior designer, an intermediate designer, and a junior designer. Together each team is rounded-out in their skill set and can address all of the various needs from design to writing proposals to returning samples. There’s a wide range of tasks for any given project. By employing designers at different levels in their careers, we are able to service all of those different needs.

ACP: How much design autonomy do the teams have? Is the creative aspect all you and they’re managing and implementing, or are they also contributing ideas?

MQ: They’re definitely contributing ideas. But for the teams, I’m the client, right? Our firm has a specific point of view that comes from the way that I see the world. And so, when they’re looking at projects, they’re in charge of bringing their own creative ideas, but they’re also keeping in mind “What would Mead do?” “How would she see this?”

At the beginning of each project, we always make sure that we’re in alignment. We put together a set of adjectives that describe the project, mood boards that create a look and feel, and color stories, so that we are all headed in the same direction. And then we have design reviews every week or sometimes twice-a-week where they show me what they’re working on and I push and pull on it a little bit; say yes or no. And then they’re off and running again; and then we meet again the following week. So, that’s how it works. They have a lot of autonomy, but since the MQ aesthetic is fairly distinct, they’re designing within that parameter.

ACP: Speaking of implementing design, let’s talk about Tuscaloosa Avenue. What were some of the design challenges and how did you overcome them?

I enjoyed the overall challenge of taking this 1990s-built Craftsman home in Atherton that didn’t have a lot of style on its own, and making it beautiful. For example, painting the exterior a dark tone helped the house merge with the landscape — turning it into something serene, and feeling nestled into the property, as if it had always been there.

When we first were brought in by the client, in 2013, we were just updating a few rooms. But about seven years later, during COVID, the client was ready to do a full-scale remodel. We completely gutted the kitchen and all of the bathrooms and re-furnished every room in the house. 

One particular challenge was the living room. It was an oddly-shaped room. And the client wanted us to use her heirloom Indian rug, which was rather small for the space, but this was a non-negotiable. Our furniture choices were dictated by the need to incorporate the rug while also wanting to create coziness around the fireplace and yet still have the room be somewhat formal and elegant, because she wanted this space to be a place for entertaining. It’s also the first room you see when you walk in the door, so we wanted it to feel special.

We were working within the constraints of a pretty traditional Craftsman home, but the client herself has a more modern aesthetic. So we were trying to figure out a way to pull some of that modern, clean aesthetic into this more traditional envelope.

We removed the crown moldings and made the doorways taller, which drew more attention to the views of the gardens and allowed more light to come in. I’m always inspired by the connection with nature, like how much can we bring the connection to the outdoors, inside? And we went with a neutral palette with gentle pops of color that create interest, but the effect is very calming overall.

ACP: The results are just stunning! So, returning to where we started, on the importance of art in interior design, can you share some tips for our readers who might be inspired to start collecting?

MQ: I think the first thing is to just get out there and pound the pavement in whatever city you are in, and go into galleries. Gallerists are always so informed and have such a wealth of knowledge about artists, whether national, or international, or local. I recommend exploring the highs and lows, in that sense. A local artist’s work may be less expensive than one that is internationally-known.

Also, thinking about your values is key because art is important to different people for different reasons. For example, we have clients who are really focused on supporting local artists or LGBTQ artists, and then others are more focused on “blue chip” art and resale value. 

There is no right or wrong answer. It’s just knowing what matters to you. Because the world of art is so vast, understanding what’s meaningful to you is a good place to start and then getting out and seeing art and talking with gallery owners can be a way to clarify and expand that awareness.

You can work with a designer to help you choose art, and there’s amazing art consultants out there. Or you can use Instagram and filter by hashtags and just get on a trail and go forever.

ACP: Are there particular Bay Area galleries or annual art shows that you recommend?

I would say the annual FOG Design+Art fair in January is important to attend. It’s huge and amazing — with all of these galleries showing contemporary artworks at Fort Mason. There’s around 40-50 exhibitors. So you can see a lot in one fell swoop! (More info: fogfair.com)

I also really love Artsource Consulting and Jody Knowlton (artsourceinc.com). Jody has helped us on a couple of projects. She curated our Decorator Showcase room in 2018. 

I appreciate working with Jody because I know what looks pretty and I can talk to the galleries myself and figure out the meaning and make a selection, but also it’s really helpful to have an art consultant who — that’s all they do. So they know all the ins and outs and can explain to you why an artist or a particular piece is significant. Having that information and education can help you determine why you might or might not want to purchase a piece and include it in your collection. 

For more images of Mead Quin’s interior design work and many examples of how beautifully art and design play together in her world, visit her website: www.meadquin.com

Click here to view more images of this particular project, inside and out, on MQ’s website.

Past interviews with Mead Quin on our blog: Designers’ Favorites: Mead Quin on White Interiors and Beautiful Books for Cozy Reading Nooks

Deck-DSC_3679

Mastering the Art of Staining a Wooden Deck

To Stain a Wood Deck

Ah, the wood deck – an iconic American symbol of indoor=outdoor living at its finest. An outdoor sanctuary, a summer stage, and, occasionally, a faded, maybe peeling and splinter-riddled beast demanding attention. While a well-stained deck can be the crown jewel of your backyard, staining your deck is a job in and of itself and not for the faint DIYer heart! Fear not though, fellow deck owners and DIYers, we are here to stain your deck if you don’t feel like it! However, if you do want to give it a go, this article will attempt to explain to you (like one might try to explain how to tie shoelaces) how to stain a deck like yours so that you can enjoy it for the summer and all year round. Please note: We highly discourage painting your deck.

Prepare the Canvas: Cleaning the Deck

Before any sort of stain material can be applied or reapplied, you must clean the surface of the wood. This is still true if the material is new as it can have a film on it from milling. Start by removing any furniture, plants, or rogue barbecue grills that have taken up residence. Sweep away leaves, dirt, and anything else that might be plotting against your perfect finish and do a good rinse with preferably a power washer. Be careful not to damage the wood or leave marks from the high pressure. You can clean mildew and mold with a mixture of water and mild detergent. Even better to use a deck brightener if it’s really dirty or has embedded mildew. After the wash, you may see some raised wood grain. Sand it down.

Inspect and Repair: Deck Health Check-Up

Your deck might be hiding secrets beneath its weathered exterior – loose nails, cracked boards, or splintering wood. Inspect and address these issues before you begin stain application. Tighten screws, replace damaged boards, and sand down rough spots. This is your chance to play deck doctor and ensure your wooden patient is in tip-top shape before the staining process begins.

Choose Your Material: Selecting the Right Stain

Stains come in a myriad of options, but that doesn’t mean that all of the options are appropriate for your deck. From transparent to semi-transparent, semi-solid to solid, the choice can be overwhelming. Transparent stains highlight the natural beauty of the wood grain, but can only be used where transparent stain has been used before or when a deck is new.  While solid stains offer robust protection and vibrant color, they act more like a paint and can start to peel. We heavily discourage solid stain, but sometimes it is unavoidable. We cannot offer much of a guarantee against peeling. If the previous owner used it, you may be stuck with it unless you have a large budget to sand it down and remove it. Consider the level of exposure your deck endures – full sun, partial shade, or the occasional monsoon – and choose accordingly. Remember, the right stain is your deck’s armor against the elements and it can save you a lot of time in ongoing maintenance.

Timing is Everything: The Perfect Weather Window

Staining a deck isn’t just a task; it’s an event, and like any grand event, timing is crucial. Aim for a mild, dry day with temperatures between 50°F and 90°F. Avoid direct sunlight, as it can cause the stain to dry too quickly, leaving you with a patchy finish. Also, ensure no rain is in the forecast for at least 48 hours post-application. If you must stain a deck ahead of a threat of rain, use an oil-based product. We highly recommend Messmers UV Plus.

Gather Your Supplies and Application tools

You will need:

  • A high-quality brush or roller
  • A bag of rags
  • A paint tray or bucket
  • Painter’s tape (to protect areas you don’t want stained)
  • Drop cloths (for those accidental splatters)
  • Protective gloves and clothing
  • Stir sticks (for mixing the stain)

Make sure you have everything before you get started because you don’t want to stop mid-application or in a place on your deck where you will see overlap when you pick back up again.

Finding the Perfect Color

Most stains have stock colors. Finding the perfect color should not be difficult. Go with a semi-transparent stain like Messmer’s UV plus and choose from their 8 colors. If you need a solid or semi-solid stain, Benjamin Moore’s Wood Luxe product can be mixed into any Benjamin Moore color.  Give your stain a thorough stir to ensure the pigments are evenly distributed. Before you commit to covering the entire deck, test a small, inconspicuous area. This will allow you to see how the stain interacts with your wood and ensure you’re happy with the color. Remember, stain colors can vary depending on the wood type and previous treatments, so this step is your safety net against unexpected surprises.

Master the Application: Staining Techniques

Now, for the main event – the application. Start with the railings and intricate areas, as these often require more precision. Use long, even strokes, working with the grain of the wood. For larger areas, a roller can speed up the process, but follow up with a brush to ensure even coverage and avoid lap marks. Work in manageable sections, and always keep a wet edge to prevent streaks. Patience and consistency are your allies here. And again, make sure to watch the weather. Do not apply more than one coat of oil-based semi-transparent paint. It will not absorb evenly and will become sticky and splotchy looking.

Let It Dry: Patience is a Virtue

After stain, resist the urge to dance upon it immediately. Drying times vary depending on the stain type and weather conditions, but generally, 24-48 hours is a safe bet. You can read the product label to see what type of dry time your specific product has. Keep an eye on the forecast and ensure your deck remains dry during this period. This is the perfect time to plan your next backyard barbecue, dreaming of the compliments your newly stained deck will garner.

Maintenance Matters: Preserving the Beauty

A beautifully stained deck is a sight to behold, but maintenance is key to preserving its glory. Regularly sweep away debris, clean up spills promptly, and give it a gentle wash as needed. Every few years, depending on wear and tear, you might need to reapply a fresh coat of stain to keep it looking its best. Think of it as a spa day for your deck – a little pampering goes a long way.

Staining a deck requires skill, preparation, precision, and patience. Feel free to call us if you don’t have those! We’d be happy to do your deck. Otherwise, follow these nine expert tips, you’ll transform your outdoor space into a stunning retreat that will stand the test of time. So, roll up your sleeves, channel your DIYer, and bring the glory to your deck that it deserves.

312334196_506230011517747_5646806907717512788_n

Accent Walls: Ideas and Inspiration

In certain spaces, an accent wall or walls can transform the character of a room in a myriad of ways depending on your goal. With just a splash of color or an interesting texture, a room can come alive by simply helping to break up the monotony of plain walls. The following are ways that you can use to determine is an accent wall appropriate for the room your considering and how to go about choosing that color.

Why add an Accent Wall?

An accent wall serves as a focal point, drawing attention and adding character, color and/or texture to your space. It can be like the diamond on the ring of your room—stealing the spotlight and making everything else look good. It can also balance out other colors or provide a bold contrast in a mostly neutral space. Plus, it is a fantastic way to experiment with bold colors and patterns without overwhelming your entire room. Accent walls can also be done with paint, wallpaper, wood paneling or wainscotting.

Choosing the Right Wall to Place Your Accent

Before you go wild with paint and wallpaper, it’s crucial to select the right wall to accentuate. Typically, the wall you choose should be the first one you see when you enter the room. It can even be a corner space. It could be the wall behind your bed, your fireplace, or even the one where your TV hangs out. It can be used to define a specific area like the study area of your kid’s bedroom.

It should be consistent in size or shape and have clearly defined boundaries. It can make a long hallway feel less long and give a far-off focal point. You can even paint half of a wall to give the illusion of a wainscot or chair rail. If you are going to do multiple accent walls throughout your home be sure to place them strategically, don’t do multiple in a room and be sure to take your existing furniture and fixtures into account.

Bold Colors Can Make a Big Impact

When it comes to accent walls, bold is beautiful. Deep, rich hues like navy blue, emerald green, and charcoal gray can add depth and drama to your space. If you’re feeling adventurous, consider a vibrant color like mustard yellow or a fiery red to really make a statement.

Pro Tip: Use Color Theory (or hire an Interior Designer)
Understanding color theory can help you choose complementary colors that enhance your space. For instance, a deep blue accent wall can look stunning with white or light gray furniture, creating a nautical vibe. Or you can call one of our many interior design colleagues highlighted in our blog.

Textures and Patterns Add Dimension – If you’re not just content with a solid color, consider adding textures or patterns or different materials to your accent wall.

Wallpaper
Wallpaper has made a major comeback in recent years, offering a plethora of patterns, from elegant florals to edgy geometric designs.

Wood Materials
For a rustic or farmhouse look, wooden planks or shiplap can add warmth and texture. There is even horizontal lined pattern wood that comes in rolls that completely changes an area like one wall in an entry for hanging coats and storing shoes. A thinly spaced horizontal wood accent can warm up that corner and add a backdrop that takes mutes the potential clutter of storing jackets and shoes.  that You can go for a natural wood finish or paint the planks in a color that complements your decor.

Brick and Stone
Exposed brick or stone walls can add an industrial or rustic charm to your home. If you’re not blessed with natural brick, faux brick panels or stone veneer can do the trick without the hefty renovation costs.

Stenciling and Murals
For the artists at heart, stencils and murals can turn your wall into a canvas. Whether it’s a subtle pattern or a full-blown mural, these options let your creativity shine. Ask us for a referral to a decorative painter!

Accent Walls with Paint Techniques

Sometimes, it’s all about the technique. Here are a few ideas to get those creative juices flowing:

Limewash or Venetian Plaster
All the rage right now, Limewash is an elevated faux finish that give you a smoother transition between colors and visually can look like suede. You can choose any palette of colors and its all in the application technique. Venetian Plaster can also produce a similar effect when used with bolder colors, but it more typically used on a whole house rather than just an accent.


Ombre Effect
An ombre wall transitions from one color to another, creating a gradient effect that can be incredibly soothing and visually intriguing.

Stripes and Chevrons
Stripes, whether vertical or horizontal, can add a dynamic feel to your room. Chevron patterns are a modern twist that can make your wall look like a piece of art.

Sponging and Rag Rolling
These techniques add a textured look to your walls using paint and simple tools like sponges or rags. They can create a soft, cloud-like effect or a more dramatic finish depending on the colors used.

Functional Accent Walls
Who says accent walls can’t be functional? Here are some ideas to make your accent wall work for you:

Gallery Walls
Turn your accent wall into a gallery by displaying your favorite artwork, photos of your family, or even mirrors. This not only personalizes your space but also adds visual interest.

Shelving/Library
Incorporate a whole wall of shelving to hold your mountain of books, display your artwork and pottery collection, your plants and even your flat screen TV into your accent wall to combine beauty with functionality.

Chalkboard or Whiteboard Paint
Perfect for a kitchen or a kid’s room, chalkboard or whiteboard paint can turn your wall into a giant notepad. It’s both fun and practical.

General Ideas for Accent Walls in Different Rooms

  • Living Room
    an accent wall can be the backdrop for your entertainment center or behind your couch. It can even be a statement piece like a large piece of art.
  • Bedroom
    In the bedroom, the wall behind your bed is the perfect spot for an accent wall. It can add a sense of coziness and intimacy. If you have a defined corner for a desk or a bump out for built in seat or library.
  • Kitchen
    In the kitchen, an accent wall can be a great way to highlight a breakfast nook or dining area. Remember to use paint with at least an eggshell sheen.
  • Bathroom
    Don’t shy away from accent walls in the bathroom. Tile or wallpaper can add a touch of luxury.

Creating an accent wall can be fun and can add dimension to your space. It is an exciting way to breathe new life into any room. With the right combination of colors, textures, and creativity, you can turn a simple wall into a spectacular focal point. If you need assistance on choosing color, give us a call! We have amazing color consultants and interior designer at the ready!

GRATITUDE (1)

The Power of Gratitude

Everyone knows that it is good manners to thank people. What might be less intuitive is that showing gratitude creates a whole host of positive outcomes for the grateful person.

According to The University of California at Berkeley, practicing gratitude can lead to benefits in the physical, psychological, and social areas of a person’s life. Having a stronger immune system, being more alert and optimistic, and feeling less lonely or isolated are just a few of the ways that a person could notice an improvement over time. The social aspect is possibly the most important because gratitude can help strengthen relationships by affirming others.

Psychology Today highlights gratitude’s role in the relationship of a married couple.  Over time it is common for a person to become numb to their spouse’s good qualities and only focus on the annoying parts of their personality. This leads many couples to think that they have lost the spark

But, couples who have an ongoing appreciation for one another are less likely to end their relationship and more likely to become closer, research shows.

One great technique for showing appreciation to a partner is by actively listening. Lean in, make eye contact, and show them that what they say is important.

In the realm of business, showing appreciation for a job well done was a better motivator than a financial incentive in most cases. Without that crucial interaction, employees will be much more likely to be unhappy with their jobs, miss work, burnout, or even quit.

Catherine Baldi and Ernesto Perez Arana of Arana Craftsman Painters by SRK Headshot Day

Professional Craftsman vs. Amateur: The Advantages of Hiring Arana in the Bay Area

Why hire a house painter when you can hire a craftsman? Arana is a family-owned business with over 60 years of professional painting experience and roots in the Old World tradition.

At Arana Craftsman Painters, we leave little to chance because we follow a tried-and-true set of steps.

Philosophy

These crucial steps are our “secret sauce” so to speak and it has allowed us to consistently build a reputation of reliability, exceptional quality and professionalism over the last 17 years.

yelp nextdoor houzz logo group PNG

The steps to exceptional interior painting include:

  • Protecting your home and environment (family, pets, surrounding surfaces, furnishings, valuables, all areas not scheduled for paint)
  • Scraping/sanding to remove old layers of  paint that will negatively impact the integrity of your new paint at a standard that meets our         5 Year Warranty
  • Thorough cleaning of the surfaces scheduled for work to remove any contaminants
  • Priming, Caulking and Patching       
  • Exceptional Painting

Process

  1. Pre Job Walkthrough: Our Production
    Manager and Estimator will meet with you prior to the scheduled project start date to confirm start date, scope, sequencing, and colors. Essentially all expectations are reconfirmed to assure smooth handoff between our Estimator and our Production Department. Proper communication is the key to exceptional quality and you having a great painting experience. At this point when we arrive at your project, our Crew Leader and Crew have a solid plan as to what processes will take place first and in what areas.
  2. Color Consultation: Arana Craftsman Painters works with top San Francisco Bay Area Color Consultants and on projects needing a consultation, the Consultation is included in our bid. Having colors chosen ahead of time makes your life so much easier. We’ll even put up swatches so you can see the color in real life and make a final decision.
  3. We set up a neat and organized area for our equipment, tools, and products, a home base, where we can safely and efficiently manage your project.       
                                                                                   
  4. In addition to a dedicated Production Manager, every project has a dedicated Crew Leader who works closely with you, our Production Manager and our office to assure timely resolution to any challenges that arise, quality control, sequencing and assuring you have an amazing painting experience!

Guarantee

Sustainability

Paint will not adhere properly without expert preparation. Proper preparation is the cornerstone of exceptional quality.

We sand, scrape, and prime as appropriate to ensure proper adhesion. We contain particulate and dust exposure per Environmental Protection Agency safety standards and Arana Craftsman Painters is an EPA Lead-Safe Certified Contractor.   

EPA Lead-Safe Firm

For the safety of everyone involved, are all the painting contractors you have bidding on your project EPA Lead-Safe Certified?

After primer is applied, we patch, caulk and fill for aesthetic and in some cases sealing purposes or to prevent water incursion.


Latest Color Trends 2022 Webinar

This Arana annual webinar explores Color Trends and Colors of  the Year for 2022. Perfect for Interior Designers, discerning Homeowners and General Contractors contemplating your next amazing project

Additional Resources

Inspiration Hub: Webinars & Project Guidance
Latest Color Trends 2022 Webinar
10 Things to Consider When Choosing Paint Colors for Your Interiors
Wallpaper Trends and Solutions Resource Guide 2022

Have a Painting Project You’d Like Us to Look at For You or Questions!

6 McSmith Kitchen For Web-3633

Common Painting Mistakes and How to Avoid Them

As professional painters we know that you can paint yourself. But do you want to? Are you prepared for the challenges that come along with it and how much will you be able to accept the level of detail and finish that could result. Whether you’re painting a room or a whole house inside or out, there are common mistakes that can turn your project into a frustrating mess. But fear not! We will walk you through the most common blunders and show (as best as is possible in a written article) how to avoid them, to ensure a smooth as possible and as “professional” a finish as possible every time.

Preparing for Painting

Before you even dip your brush in paint, proper set up and preparation for the task is key. An ounce of prevention in the form of time spent planning and getting ready can save you a lot of headaches down the line. Handling the small details now and having a plan to manage them as the process is ongoing is of vital importance.

Choosing the Right Tools

The first step in any successful painting project is having the right tools. This includes drop cloths, scraping tools, putty knives, buckets, receptacles to mix mud and other patching materials, the best brushes (not the cheap plastic ones), rollers, roller handles, hand masker and other masking tools. High-quality tools and especially brushes can make a huge difference in the final result.

Surface Preparation

Prepping the surface to be painted is crucial. This breaks down into a few steps:

  1. Cleaning the surface thoroughly, by removing loose and failing paint, sanding, dusting and vacuuming a surface and ensuring it’s dry and smooth. A glossy surface must be “abraded” before it can accept any new paint. If you are working on an exterior project, washing it in order to remove films that have developed on the surface may be needed. A well-prepared surface will hold paint better and look more professional.  
  2. Prime the surfaces that need to be patched. When outside, we recommend all surfaces receive a coat of paint (some limitations may apply, it is a case by case basis).
  3. Patch holes and caulk between trim and wall surface. Epoxy small sections of rotted wood.
  4. Prepare surface to a “paintable surface” which is clean, smooth and ready to receive paint.

Common Painting Mistakes

Even seasoned painters can make mistakes. Here are some of the most frequent errors and how they can derail your painting project.

  1. Skipping Primer
    Primer is essential for a smooth and even finish, especially on new or repaired surfaces. Skipping this step can result in blotchy and uneven paint coverage. Some exceptions do apply, we evaluate on a case-by-case basis. For example, stucco does not always need to be fully primed before paint, but again, it depends.
  2. Using the Wrong Materials for the Wrong Application
    Never use caulking to patch a Use Bondo to fill small holes only and don’t overfill because it dries hard and become a mess to sand. If you use spa hole.ckle, make sure to over fill the holes because it shrinks in the hole. Spackle is easy to sand, but fill needs to be precise. When caulking, be sure to not wipe away too much. Be sure to allow materials to dry fully before painting over them. Be careful not to use too heavy a grit of sandpaper on the surfaces you are sanding. AND NEVER use masking tape on floors or any other surface that you do not want it to become a permanent part of.
  3. Not Masking and Protecting the Surrounding Areas Properly
    You don’t realize how much can be screwed up around when painting until you either start to do it yourself or hire a JoeBlowIt painter. When painting a wall you need to run a tape line along the baseboard. You need to mask the floors 6 inches from the base with masking paper, and cover the remaining area of the floor with a drop cloth (plastic backed in case of spills. Don’t forget to cover surrounding furniture!
  4. Overloading the Brush
    It might seem like loading up your brush with a lot of paint will speed up the process, but it often leads to drips, streaks, and an uneven finish.
  5. Not Using Painter’s Tape
    Painter’s tape is your best friend when it comes to creating clean lines (a DIYer will need tape to create lines. A professional painter will not) and protecting areas that shouldn’t be painted. Skipping this step can lead to a messy and unprofessional look.
  6. Painting in the Wrong Order
    There’s a correct sequence to painting a room: start with the ceiling, then trim (baseboard, windows and frames, doors and frames) then the walls. You’ll have to cut all of the lines along the ceiling and trim to about 2 – 3 inches down the wall and then roll the remaining walls. Ignoring this order will cause you to get paint on items already painted.
  7. Poor Surface Cleaning
    Dirt, dust, and grease can prevent paint from adhering properly. Failing to clean the surface thoroughly can result in peeling and chipping paint.
  8. Ladder Safety
    Ladders can be hazardous even at 4’ tall. Be sure that if you need to use a ladder that it is in workable order, that it is on an even surface and that you always maintain at lead one hand and two feet on the ladder at all times. Never stand on the top edge of the ladder and make sure that you are not over extending yourself or that you aren’t scared of heights.

Other things to take into consideration

Effective Surface Cleaning Methods
Clean your surface thoroughly with a mild detergent and water. For stubborn grease, use a degreaser. Make sure the surface is completely dry before you start painting.  

Using Quality Paint
Investing in high-quality paints can make a big difference. They often require fewer coats, have better coverage, and look more vibrant. A high quality paint resists scuffs, is cleanable and colors are less likely to fade.
 
Applying Multiple Coats
Don’t be afraid to apply multiple coats of paint. 2 coats is the standard. Certain saturated colors like Red, Blue and Purple can require more applications. It’s better to have a couple of thin coats than one thick, gloopy coat. Allow each coat to dry completely before applying the next.
 
Drying Times and Conditions
Pay attention to the drying times recommended by the paint manufacturer. Also, consider the humidity and temperature of your environment, as these can affect drying times.

Painting doesn’t have to be a daunting task filled with pitfalls if you take the proper time, plan and invest in high quality tools and paint. By preparing properly and avoiding common mistakes, you can achieve a beautiful, professional-looking finish. Remember to take your time, use the right tools, and follow the tips outlined above. Happy painting!

FAQs


 1. How long should I wait between coats of paint?
 Generally, you should wait at least 2-4 hours between coats of paint. However, it’s best to follow the drying time recommendations on the paint can.

 2. Can I use any type of paint for my project?
Different projects require different types of paint. For example, use latex paint for walls and ceilings and oil-based paint for trim and doors. Always check the label for suitability.

 3. How do I clean my brushes after painting?
Clean brushes with warm soapy water for latex paints or mineral spirits for oil-based paints. Rinse thoroughly and let them dry completely before storing.

4. Why is my paint peeling?
Peeling paint can be caused by poor surface preparation, applying paint to a dirty or greasy surface, or using low-quality paint. Make sure to clean and prime surfaces properly before painting.

5.  How can I prevent paint from seeping under painter’s tape?
 Press the tape down firmly along the edges and remove it while the paint is still slightly wet. This helps create a clean line and prevents seepage.